

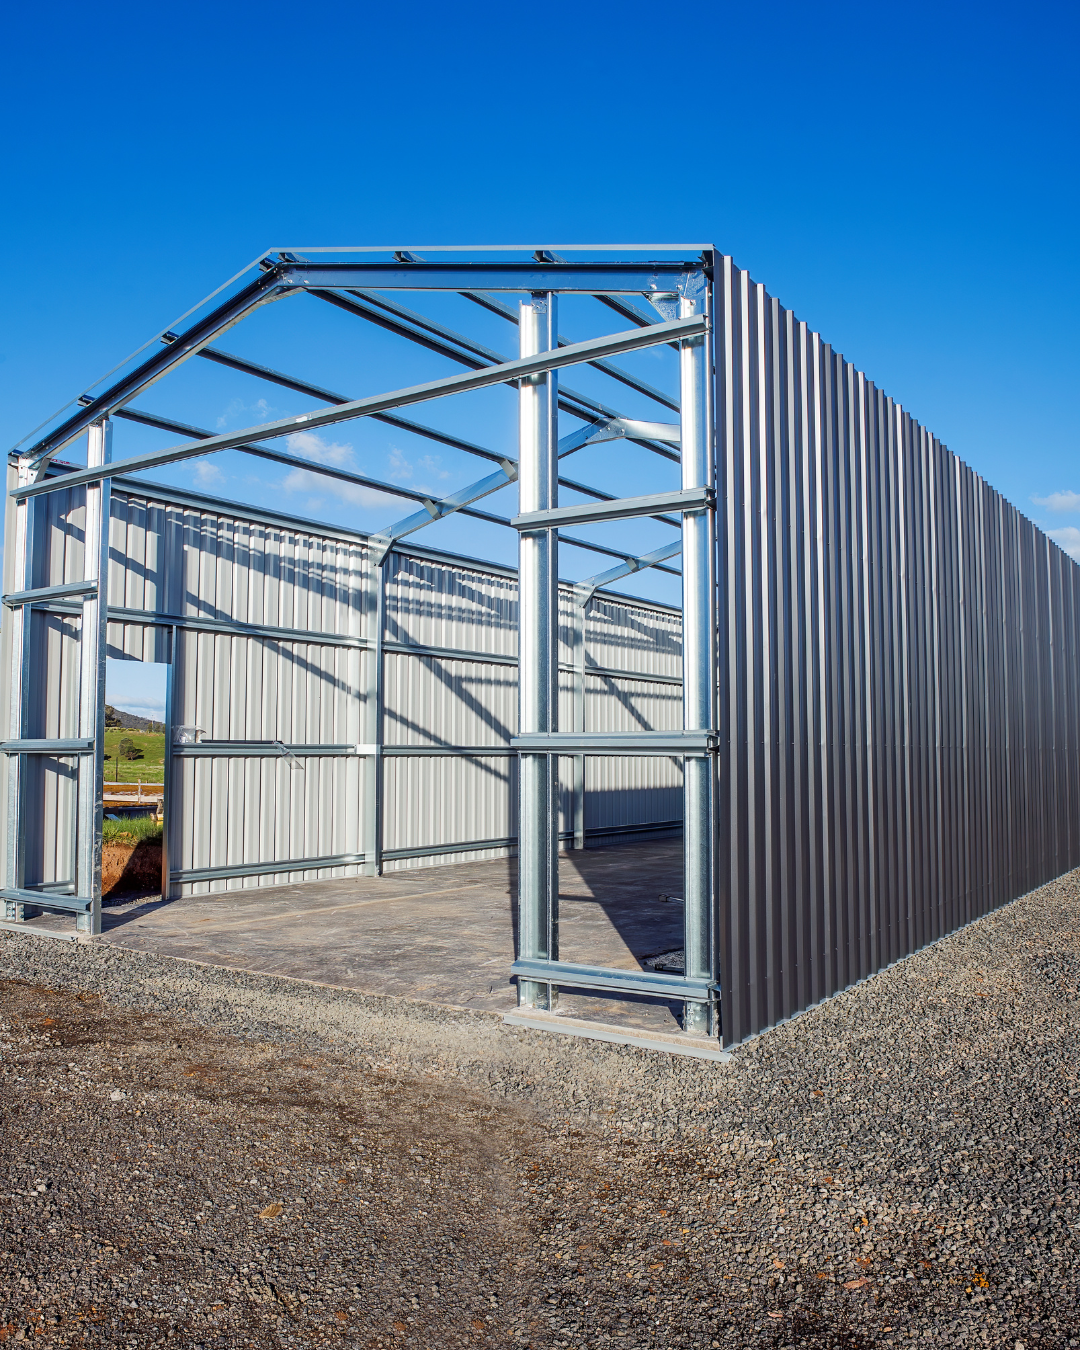
The Problem With Typical Shed Slabs
How to pour a concrete slab for a shed in Western Australia. The summer heat is your biggest enemy,
the ground dries, expands, and shifts. The concrete sets too quickly. And before you know it, hairline cracks start forming across the surface.
A good shed slab is not just about the pour itself. It is about the base preparation, curing, and mix control that happens before and after the concrete goes down.
Here is how to do it right and why new modular systems like Rombus are making traditional slabs a thing of the past.
Step 1 – Prepare the Ground Properly
Most cracks start because the ground below the slab moves.
Checklist for site preparation:
- Clear and level the area: Remove vegetation, roots, and topsoil.
- Compact the subgrade: Use a plate compactor to achieve a firm, even surface.
- Add a crushed rock base: 75–100 mm of road base provides better drainage and stability.
- Moisture barrier: Lay plastic sheeting to reduce moisture loss during curing.
- Formwork: Use straight timber or steel edging to define your slab shape.
Tip:
Never pour directly onto dirt. Soil movement from heat or rain can shift the slab and create tension cracks within months.
Step 2 – Choose the Right Concrete Mix
For most small shed slabs, a 25–32 MPa mix with 10 mm aggregate works best.
Avoid overwatering the mix, it makes the pour easier but weakens the cured slab.
Ideal thickness:
- Small garden shed: 75–100 mm
- Larger workshop shed: 100–125 mm
Use reinforcing mesh to control shrinkage cracking and improve structural integrity. Tie the mesh so it sits in the middle of the slab thickness, not at the base.
Step 3 – Pour Early in the Day
In Perth heat, pour in the early morning before surface temperatures rise.
Hot or windy conditions cause water to evaporate too fast, leading to surface cracks known as plastic shrinkage cracking.
Curing tips:
- Keep the surface damp for at least 7 days.
- Use curing compounds or plastic sheeting to retain moisture.
- Avoid walking or loading the slab until it reaches strength (typically 5–7 days for light loads).
This curing phase is the single most important step in preventing cracks.
Step 4 – Control Joints and Reinforcement
Concrete expands and contracts with temperature.
Saw-cut control joints every 1.5 to 2 metres for smaller slabs and at all changes in direction.
These joints act as predetermined weak points so any minor cracking occurs in a straight line rather than randomly across the surface.
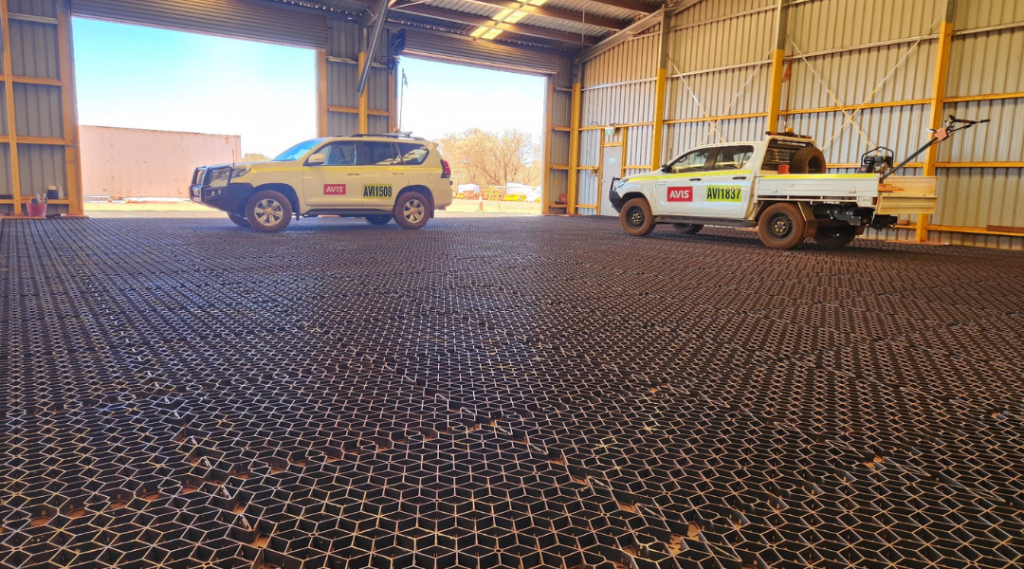
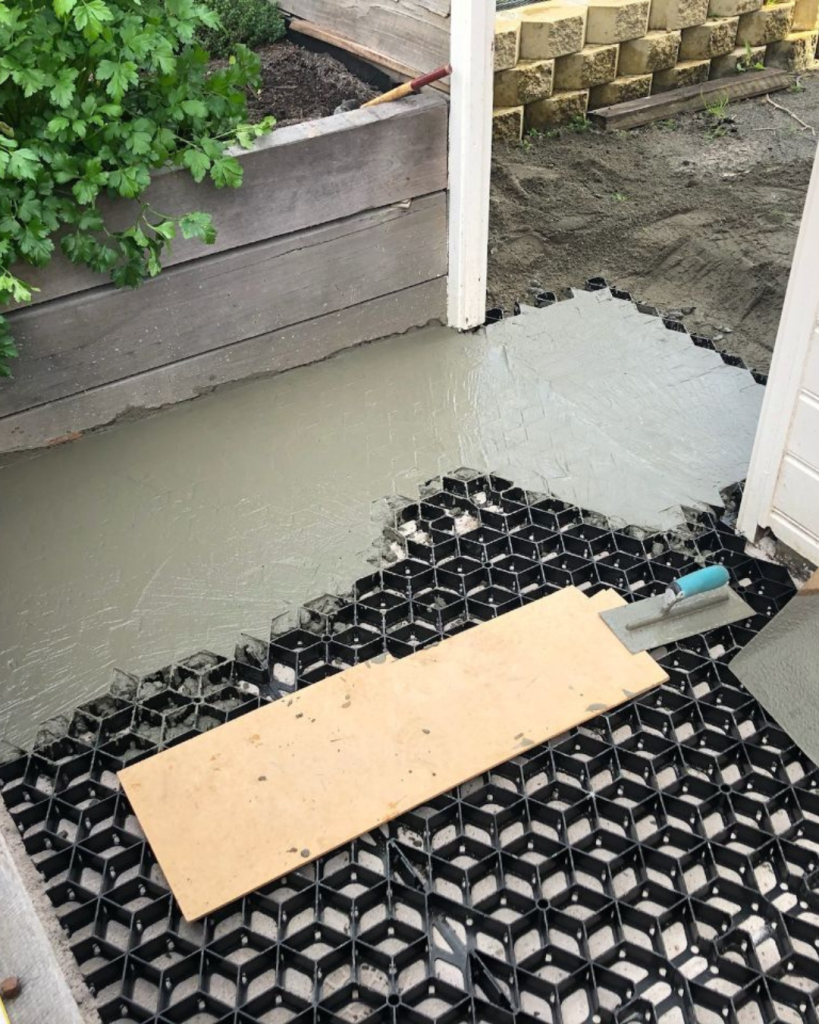
Step 5 – The Rombus Alternative
Traditional concrete works well when conditions are perfect. But shed slabs in hot, reactive, or uneven ground often fail because they are too rigid.
Rombus offers a better way.
It uses 1 m² recycled polypropylene grids, each 40 mm thick, filled with 32 MPa Rombus approved concrete.
This modular hybrid pavement behaves like concrete under load but flexes slightly under movement, stopping cracks before they start.
Each grid is lightweight (about 5.35 kg) and tested for more than 10,000 tonnes per m² when filled.
Because it is a segmented system, it naturally absorbs expansion and contraction rather than fighting it.
For shed bases in areas prone to soil shift or high heat, Rombus provides a faster install, cleaner finish, and long-term durability without cracking or curling.
Verified Rombus Data
- Grid size: 1000 x 1000 x 40 mm
- Weight: approximately 5.35 kg per grid
- Material: 96 percent recycled polypropylene with UV stabiliser
- Concrete infill: 32 MPa mix with 10 mm aggregate
- Load rating: greater than 10,000 tonnes per m²
- Made in Adelaide, with head office in Perth
Cracks are not caused by bad workmanship, they happen because rigid slabs cannot adapt to ground or temperature movement.
If you are pouring a concrete shed slab, focus on ground prep, curing, and mix quality.
Or skip the risk entirely and build it once with Rombus Flexible Pavement, designed to handle heat, heavy use, and movement without cracking.
Q: What thickness should a shed slab be?
A: For a small garden shed, 75–100 mm is ideal. For larger workshops, use 100–125 mm.
Q: Why do shed slabs crack?
A: Cracks form when the base shifts, the concrete dries too quickly, or there are no control joints to manage tension.
Q: How does Rombus prevent cracking?
A: Rombus uses 40 mm thick recycled polypropylene grids filled with 32 MPa concrete that flex slightly under stress instead of fracturing.